White Wood

Saturday, March 31, 2012

The Chair Planter

I must say this is one of my favorite projects yet!  I found a chair at Goodwill awhile back.  I wasn't quite sure what to do with it and while it was generally in good shape it was a tad wobbly.  So when I found a tutorial for a DIY chair planter I knew it was the perfect fit for this chair!  It's fun and easy and if you're looking for a fun cute planter - you can do it easily too!  Here is the before...


Once again I forgot about a before picture before I started my project.  I remembered a bit into priming the piece.  After priming, I coated it with Behr Sweet Rhapsody paint (the same color that is inside the Secretary Desk).  Once it dried thoroughly I distressed it lightly and then coated it with Rustoleum Spray Paint Clear Protective Coating.  The man at Home Depot said it was a good option because it would protect against the elements - including UV damage.  Once that was dried I stapled in a chicken wire support into the missing middle portion of the chair.  Once it was in their nice and sturdy I inserted the coconut planter liner.


And it was time to plant!  I purchased my flowers from The Pure Gardner in downtown Geneva.  I love their location, friendly service, and beautiful flowers :).


I hope you enjoyed this mini-tutorial/post.  This was my first attempt at explaining how I did something - and may not have been the best.  If you want further explanation feel free to comment or shoot me an e-mail at whitewoodsvintage@gmail.com.  Happy Saturday!


Thursday, March 29, 2012

The Yellow Rocker

Continuing to love spring break!  I've been able to start and finish lots of different projects and Matt and I even finally cleaned out one of our spare bedrooms.  Here is the latest project!  I found this rocker at Goodwill -- a bit of the caning is damaged, but other than that it was in good shape and comfy to sit in.  Once again, I forgot to take a before picture (bummer!) and remembered as I'd finished priming and just started my final coat.  Before I had started priming it was a dirty looking ivory like finish.  Here is the before with the primer...


And the after....


I used Behr paint from Home Depot in June Day.  For the yellow painted part of the chair I finished it with a coat of Minwax paste finishing wax.  I painted the caning and the seat in Benjamin Moore Oil Based Satin Impervo paint in White.   


Pretty detail on the back.


I love bright colors :).  Hope you enjoyed!


Tuesday, March 27, 2012

Spring has Sprung!

Hello all!  I am loving being on spring break -- it has given me lots of time to spend with my family and husband.  Today, my mom and I took a field trip downtown and I bought my very first piano!!  It should arrive in the next week or two - when it does I"ll be sure to share it :).

On another note, today I wanted to share some smaller springy touches I've added to my home.  Spring has come early in the midwest!  Although today was windy, overall we've been very fortunate to have some absolutely AWESOME weather.  It has inspired me to put lots of springy feeling decor around my home.  Here are a few...


My spring book page wreath!  I made this way back in January when I was just wishing spring would come so badly.  Now I can finally put it up!  Sorry the pictures not the greatest - it is on our front door and as you can see we still haven't finished scraping off the paint from when we painted it....in October (woops!).


Spring banner for the kitchen!


I love glitter.


My Easter display.  I just love all the fun pastel colors!  It might have been one of the most fun to put together yet.


Cake plates, fiesta ware, and colored glassware....3 of my favorite things!  The fun glasses are from my cousins Ashley and Morgan :).  My mom and I did the "Tour de Goodwill" on Monday - that fun glittery tea light holder is one of my many treasures from the trip.


These are cute vintage garden shears from my husband's grandmother.  They cleaned out their shed when to move up here this spring and were kind enough to let us have some of their tools.  


I hope you enjoyed all the fun springy picks!  More to come later this week :).


Monday, March 26, 2012

The Napoleonic Blue Chair

Another finished project!  I have a few more smaller things to share, but I was so excited to complete this one I figured I'd start here.  I found this little beauty at Goodwill a few weeks ago.  I had a before picture, but accidentally deleted it when I thought I'd moved all my pictures on my memory card to my computer :(.  I'm mad at myself, but I will tell you - it previously had a yucky puke green colored seat.  So I'd say big improvements have been made :).  Anywho, here is the finished product!


I used Annie Sloan Chalk paint in Napoleonic Blue, distressed it just a tad, and finished it in Annie Sloan Clear Wax.


This was my first time doing any type of reupholstery.  I found this pretty canvas print at JoAnn :).


I love this part of the chair's detail.


I just love it!  Hope you do too :).  More to come later this week!


Sunday, March 18, 2012

Hankie Valance

Hello all!  Life has been busy, but I am starting to finish some projects here and there!  I'm going to spread them out over a few days.  Today, I want to show you our new kitchen valance made entirely of hankies!
I'd seen some hankie curtains on Pinterest that I loved and my Aunt Colleen had something similar to this in her kitchen as well.  So, after collecting some handkerchiefs from an estate sale here and there and the Geneva Antique Market in town I went for it!


I decided to make it a valance since it just seemed more appropriate for the kitchen (and easier :).  It took a tidge of trial and error, but here are the results...


And some detail photos...


Hope you like it!  It was fun to make and just makes my kitchen feel even more cozy.  I can't wait to share the next project :)


Monday, March 12, 2012

St. Patty's Decor

Hello!


Sorry it has been awhile once again...I have several projects underway (something I tend to do... starting lots of things at once and, therefore, taking lots of time to finish them all) BUTTT many are near completion!  This is just a little in betweener post to show some of our St. Patty's Stuff.  


Our built in hutch filled with St. Patty's white, green, and gold fun!  Ignore me awkwardly taking the picture in the mirror.


Luck of the Irish :)


The little footed candy dish and gold and ivory dish are both Goodwill finds!  The beautiful Kate Spade carafe next to them was a wedding gift from my Uncle Steve :).


Not the best picture, but some fun candles we have as our centerpiece right now.  The cute frosty green one is an Anthro sale find.


Once again, not the best quality picture, but I made this banner using paper and some fabric.

Anywho, I hope you enjoy my St. Patty's decor!  I should hopefully have some new and exciting projects posted in the next few days!!


Monday, February 20, 2012

Our Kitchen Facelift

I have a few projects underway currently, but I hadn't posted anything in awhile and had the thought of sharing something we'd done to our home since moving in.  My husband and I became homeowners this summer!  It has been so fun to pick out paint, hunt for furniture at estate sales, and fill our home with warmth and fun pretty things.  I've also learned the challenges of being a homeowner.  Doing all the  work to change things can really kick your butt and wear you out...but when you get the result you want there is nothing more rewarding :).  Our kitchen has been one of those rewarding/buttkicking things.   This is what we moved into....

It was okay...just super super bland.  The house was clean, but basically hadn't been updated 
since the late 80s.  

So....I was kind of feeling a retro, colorful kitchen vibe.  The everyday dinnerwear we'd registered for was fiesta ware!  My Aunt Colleen had it growing it and I loved going to visit her because she had a cozy colorful kitchen filled with all different colored fiesta ware.  I decided I'd try to achieve the same feeling in my own way.  So first came the cabinets.  We made the decision to paint those just plain old Benjamin Moore oil based white.  As far as wall color - I was feeling blue.  We put about 6 different paint swatches on the wall before finally deciding on something.  I learned an important lesson here....EVERYONE is going to have an opinion.  And while you can learn lots of things from others opinions and should value them - the one person whose opinion really matters in the end is yours.  So do want you want with your home... and thats exactly what we did.  I love the color!

This is a picture after the cabinets and walls were painted.  We were in the process of getting the cabinets back on.  Note the ugly linoleum floor.  This picture doesn't even really do its ugliness justice.  I just didn't like it.  It was ugly and dirty looking and just didn't go with my cute retro kitchen.  So I decided - it had to go!  I did a lot of research on painting linoleum and vinyl floors.  I saw encouraging blogs and how to websites that said that it absolutely could be done.  I also saw people who said it was a BIG no no.  I decided it was ugly enough I didn't care if it didn't work out.  It was worth a shot.  So I went and bought some Benjamin Moore floor paint.   It's built to even paint patios and garage floors so I figured it could handle the traffic in my kitchen.  I had the color made to match one of my yellow fiesta teacups.  
Here is the same shot with our new, fun yellow floors!  It is such a difference from the yucky brown.  I will say too - it has held up beautifully so far.  It's been about 5 months since it has painted and it hasn't shown any sign of wear and tear.  It does show dirt more easily than the brown floor (obviously), but its easy to wash and we've found that as long as we're diligent about not walking around in dirty shoes it's not an issue.  Now all that was left were some finishing touches...
One day I hope I can have some of those adorable colored appliances I see on Pinterest :).


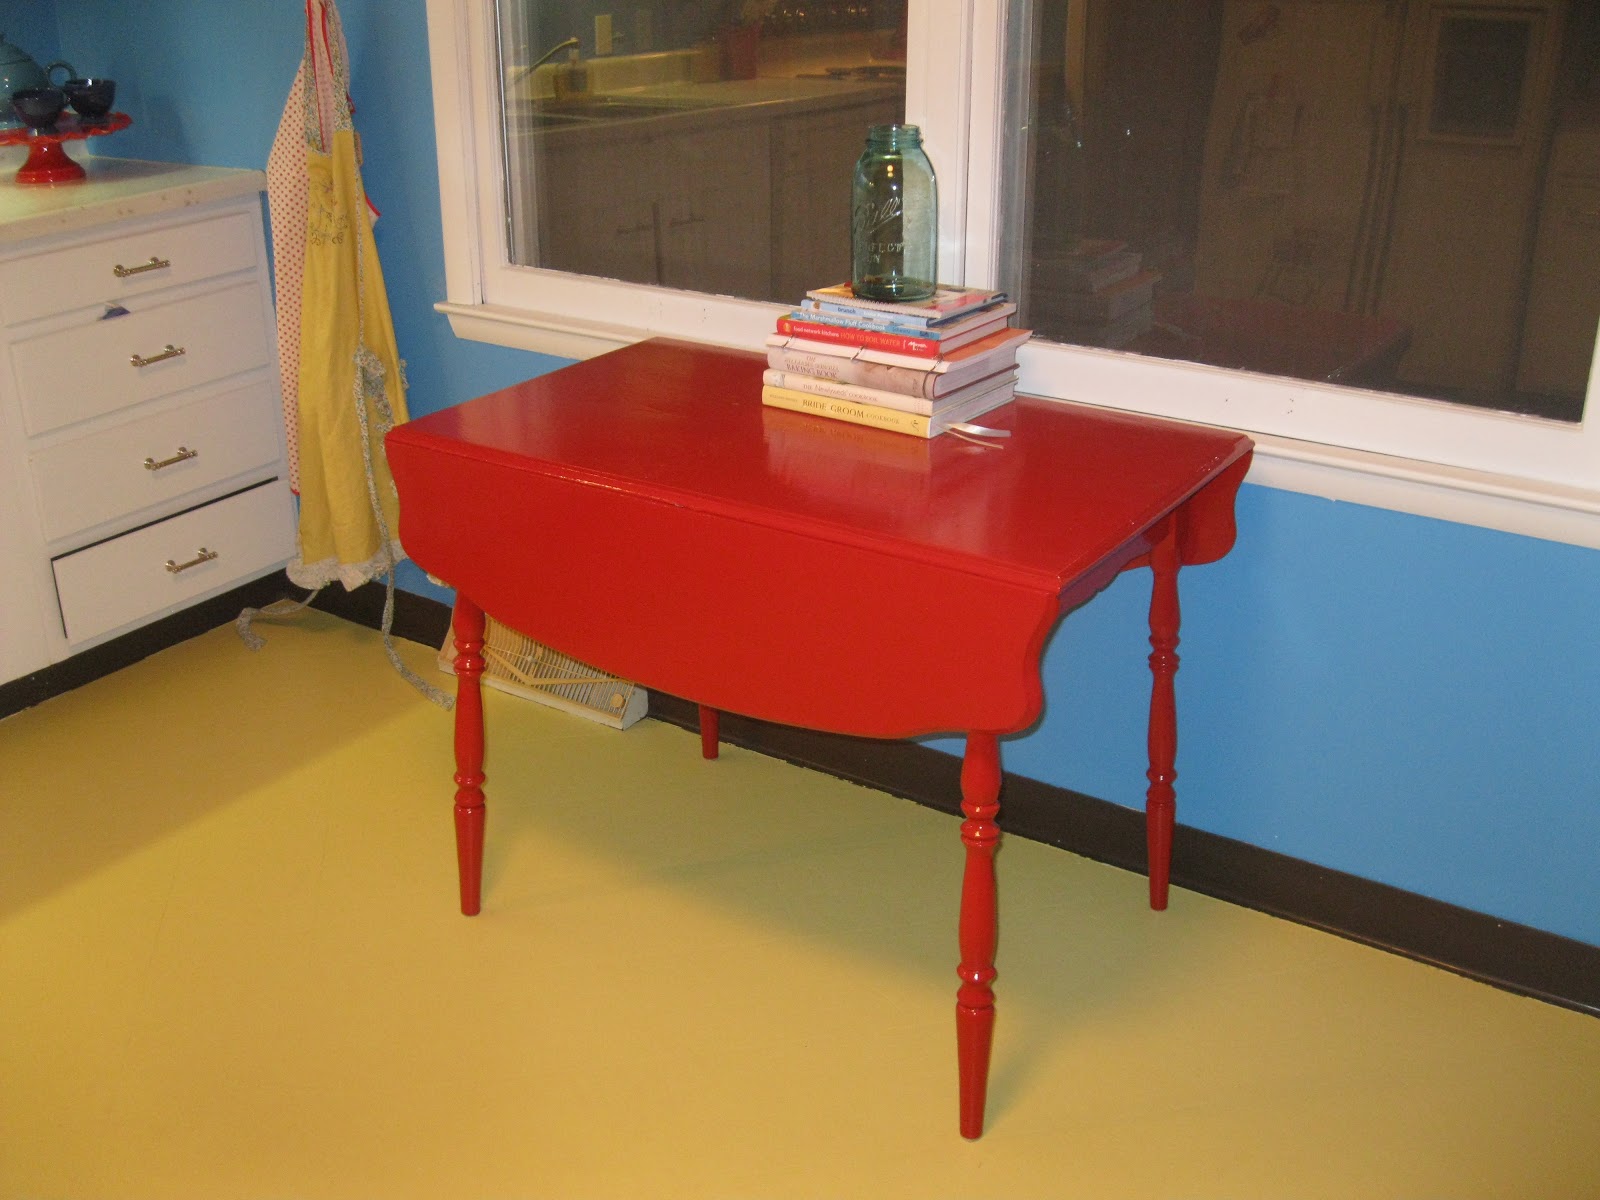
My husbands parents were generous enough to let us have this table and to let me paint it!  I had the people at the paint store color match it to one of my red fiesta plates.  I then finished with a few coats of oil based poly to give it a nice shine.  It looks so cute in our kitchen. Only problem is I haven't gotten to the chairs yet, haha.  One step at a time here people ;).


I put different scrapbook paper in the back of each cabinet.


Fiest ware :)


Fiest ware, cakestands, and vintage pyrex - so fun!


Anywho, I hope you've enjoyed my kitchen as much as I love it.  It still needs some finishing touches - possibly some wall decor.  Heck - maybe I'll do something crazy and paint the refrigerator!.....(but seriously...saw it on pinterest and looked super cute!).  I'll keep you posted!